Create a Shipment
Overview
The Create Shipment flow allows to create shipments and generate shipping labels by entering sender and receiver details, selecting the appropriate carrier, and specifying shipment and package information.
Access Method
To create a shipment:
- Navigate to Shipment Management > Shipments.
- Click Create Shipment in the top-right corner of the Shipments page.
- Fill in the necessary fields and click Save.

The Create Shipment page opens with two main tabs:
- Basic Details
- Packaging
Basic Details
The Basic Details section is used to capture all mandatory information required to create a shipment. This includes sender and receiver address details, carrier selection, shipment identifiers, and commercial information such as invoice and billing details.
Sender Details
Select or add the pickup address from which the shipment will be dispatched. To add a pickup address:
- Click Select Address drop-down to choose a sender address.
If the required address does not exist, click Add Address to create a new sender address.
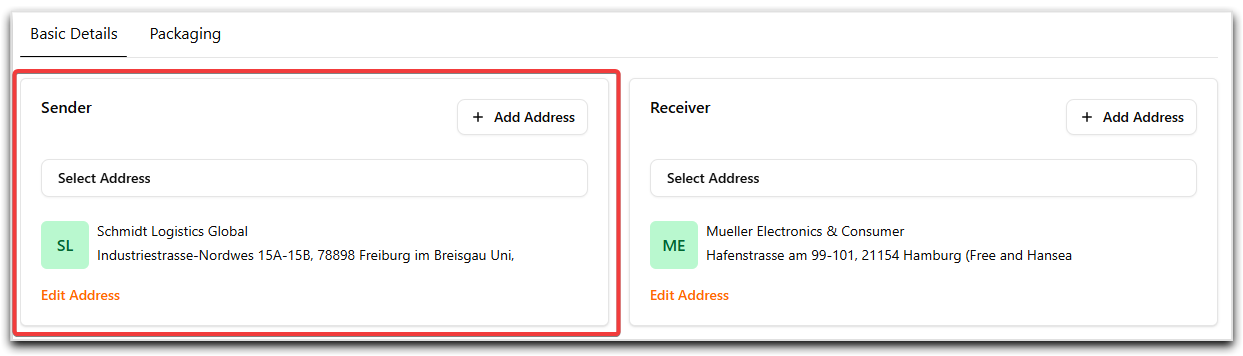
Once selected, the sender address details are displayed below the field.
Receiver Details
Select or add the delivery address to which the shipment will be dispatched. To add a delivery address:
- Click Select Address drop-down to choose a receiver address.
If the required address does not exist, click Add Address to create a new sender address.
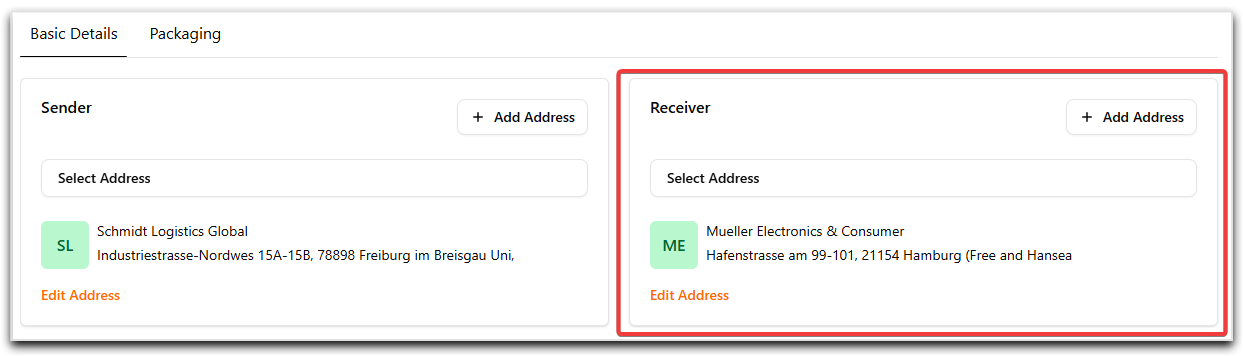
Once selected, the receiver address details are displayed below the field.
Select Carrier
This section defines the carrier, service, and carrier-specific requirements used to ship the package and generate the label.
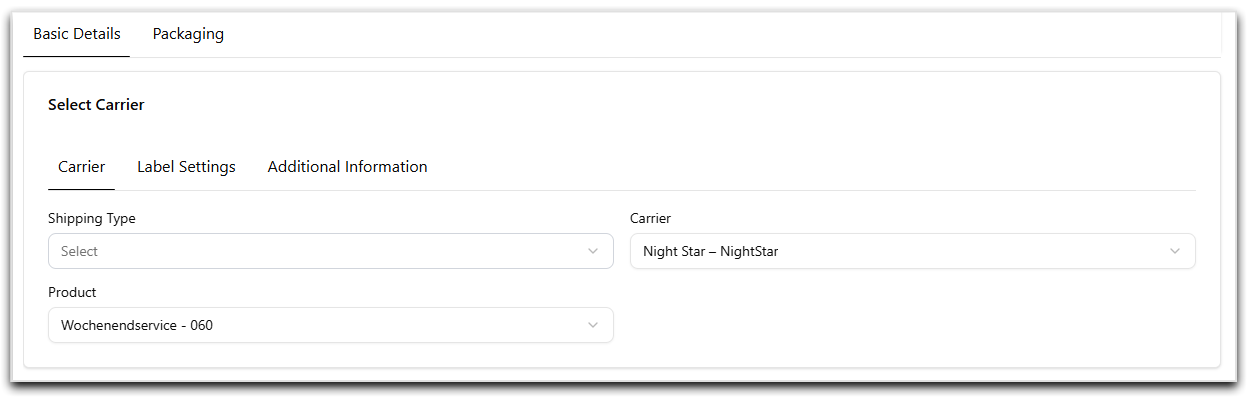
Carrier tab
| Field | Description |
|---|---|
| Shipping Type | Select the shipping type from the drop-down. Shipping Types are configured under Master Data > Shipping Type. |
| Carrier | The carrier is automatically selected based on the chosen shipping type. If not auto-selected, choose a carrier (for example, DHL, FedEx) from the drop-down. |
| Product | Represents the service offered by the carrier (for example, Priority or Economy). If not auto-selected based on the shipping type or carrier, select the product manually. |
Label Settings tab
Use this tab to configure label-related preferences, such as Loading location, Packing station, Label size and format, etc. Available options may vary depending on the selected carrier.
Dynamic Carrier-Specific tabs
Additional tabs such as Additional Information, Pickup Period, or similar may appear dynamically based on the selected carrier. These tabs may include fields for:
- Franking code
- Incoterms
- Packaging type
- Pickup date and time window
- Other carrier-specific requirements
Note
The visibility and fields within these tabs are controlled by carrier configuration!
Shipment Details
The Shipment Details section is divided into multiple tabs to organize identifiers, transport-related data, and label address configuration.
Shipment Identifiers tab
Use this tab to enter business and reference information used to identify and track the shipment.
| Field | Description |
|---|---|
| Shipment Reference | Enter the internal reference used to identify the shipment. |
| Delivery Note Number | Enter the delivery document reference. |
| Invoice Number | Enter the invoice reference. |
| Order Number | Enter the order number associated with the shipment. |
| Customer Order Number | Enter the customer-facing order reference. |
| Description | Enter the optional description of shipment contents. |
Transport Information tab
Use this tab to define the type of transportation scope and type.
| Field | Description |
|---|---|
| Domestic Transport Type | Select the domestic transport type from the drop-down. |
| Cross Border Transport type | Select the applicable cross-border transport type from the drop-down. |
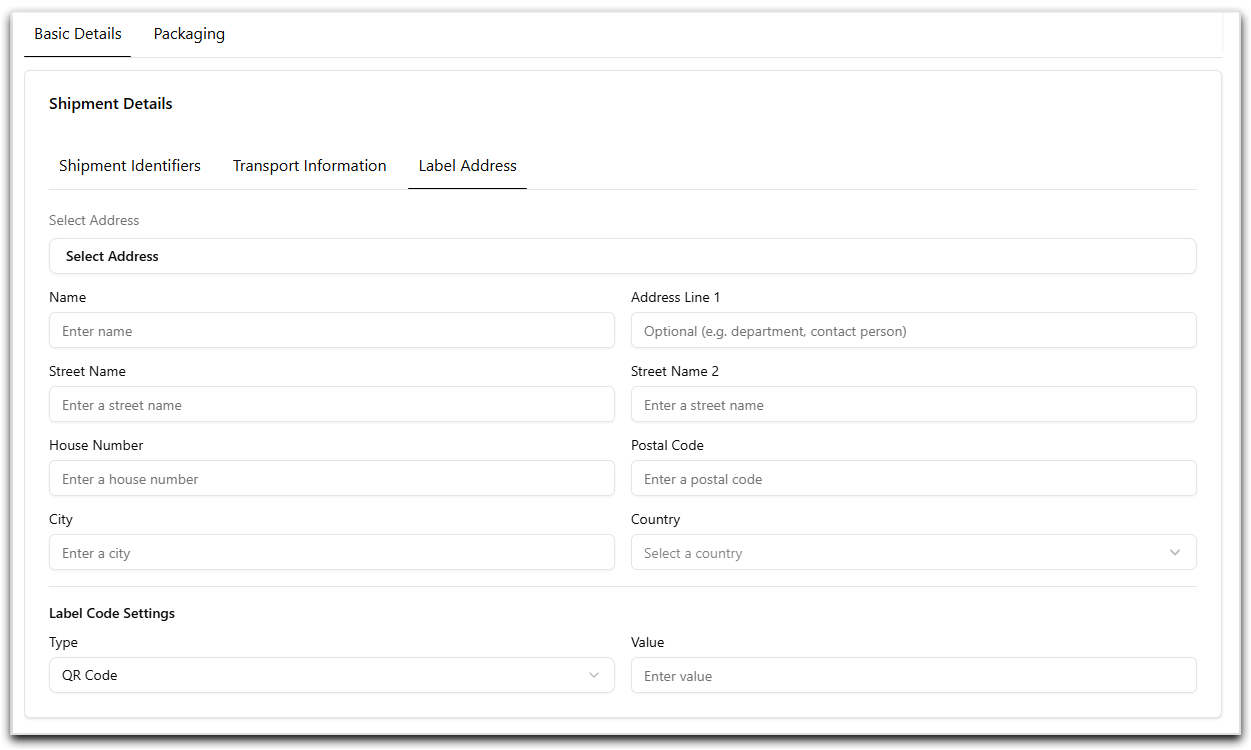
Label Address tab
Use this tab to select or define the address that will be printed on the shipping label. You can add an address in one of the following ways:
- Select an address from the Select Address drop-down, or
- Manually enter the address details in the provided input fields.
Label Code Settings
Label Code Settings control the machine-readable code printed on the shipping label.
| Field | Description |
|---|---|
| Type | Select the code format to be printed on the label: QR or Bar. |
| Value | Defines the shipment information encoded within the QR code or barcode (for example, Shipment Reference or Tracking Number). |
General Information
The General Information section is used to manage billing and invoice details such as currency, gross amount, payment information, billing address, etc.
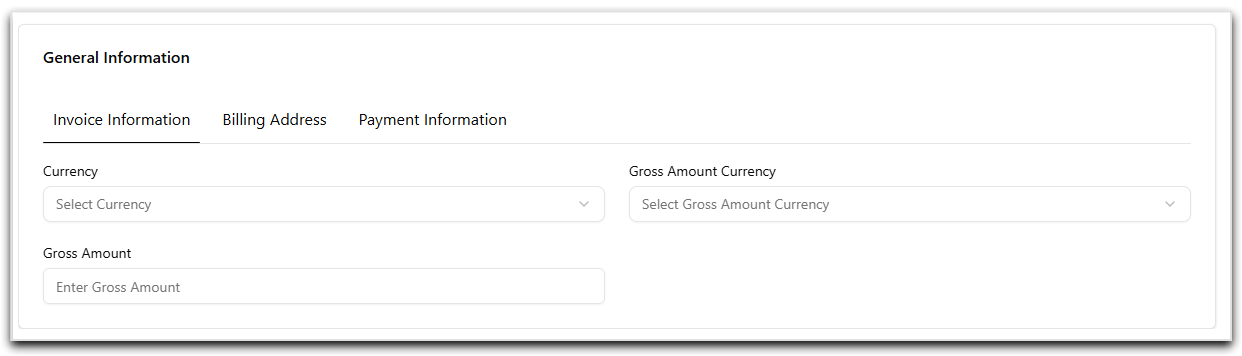
Invoice Information tab
| Field | Description |
|---|---|
| Currency | Select the currency from the drop-down. |
| Gross Amount Currency | Select the gross amount currency from the drop-down. |
| Gross Amount | Enter the invoice value. |
Billing Address tab
Use this tab to select or define the address that will be printed on the bill. You can add an address in one of the following ways:
- Select an address from the Select Address drop-down, or
- Manually enter the address details in the provided input fields.
Payment Information tab
Use this tab to configure payment-related details if required by the carrier or shipment type. This section includes the payer information of the shipping and duty charges. Fill the input fields accordingily.
Packaging
The Packaging section defines the physical characteristics of the shipment. A shipment can contain multiple packages, and each package can contain one or more articles.
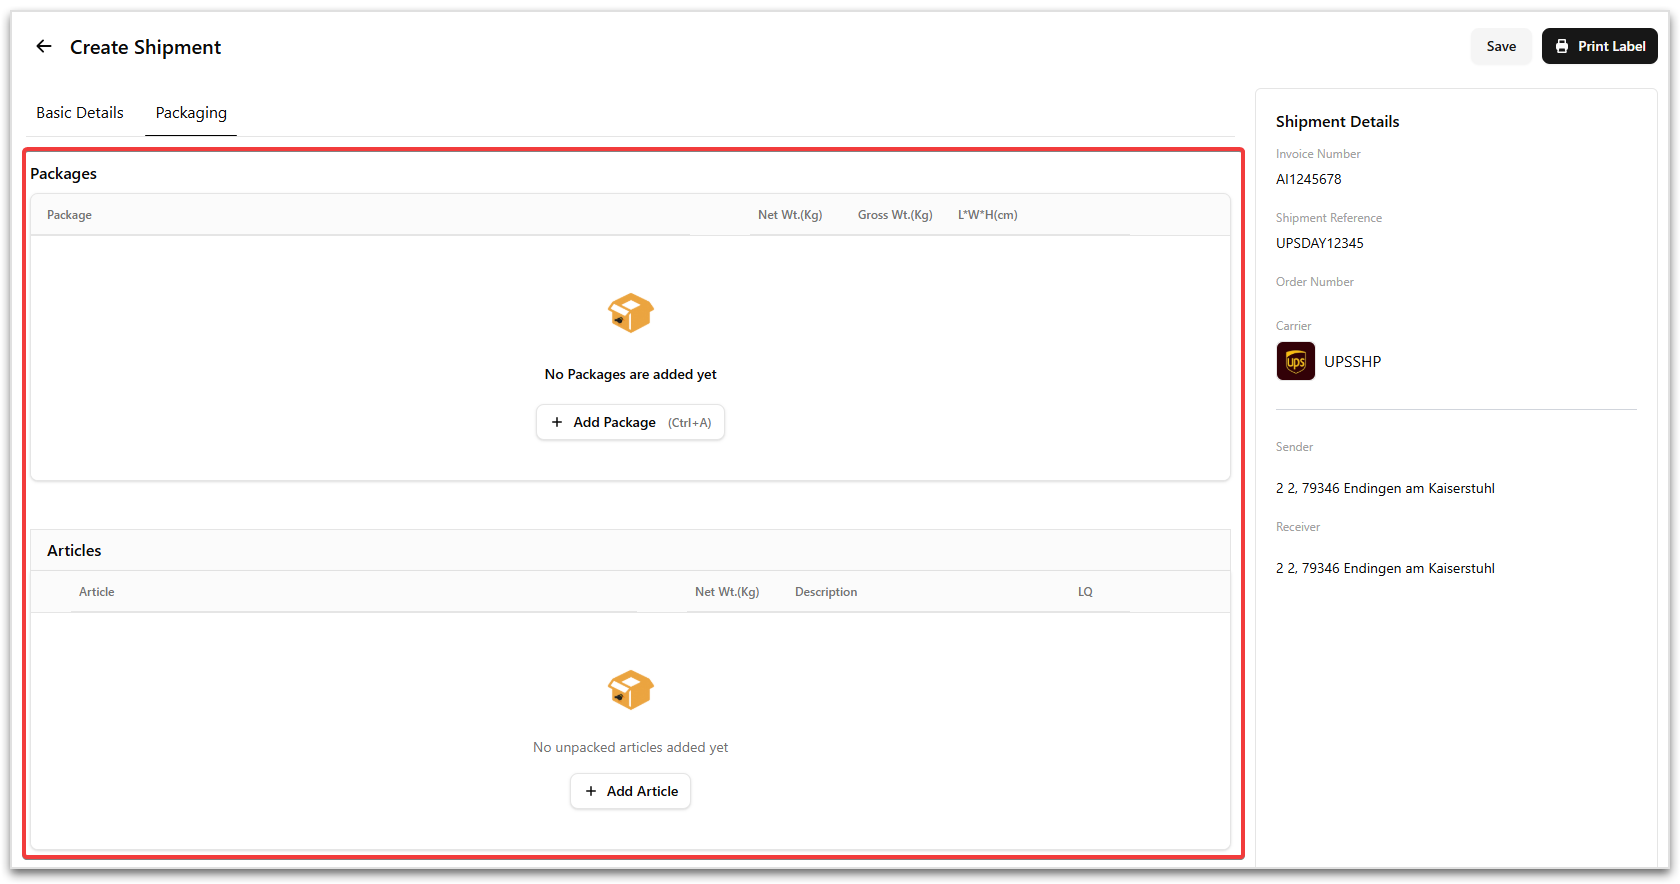
The section is divided into two parts:
Packages – used to define the shipment packages and their dimensions. Articles – used to add and manage items inside each package.
Adding Packages
To add a package:
- Click Add Package action on the Packaging tab.
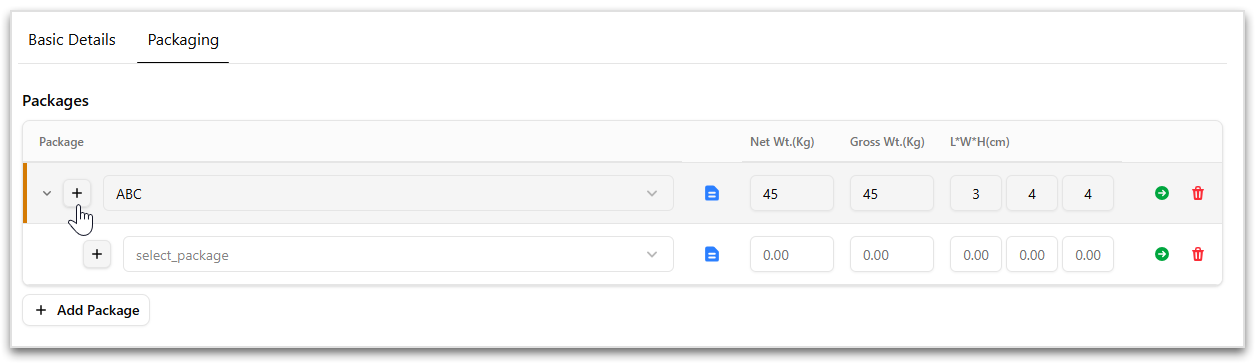
- Select a package type from the drop-down.
- Fill in the respective input fields, such as weight, dimensions, etc.
To add a nested packaging for the current package:
- Click the + icon next to the package row.
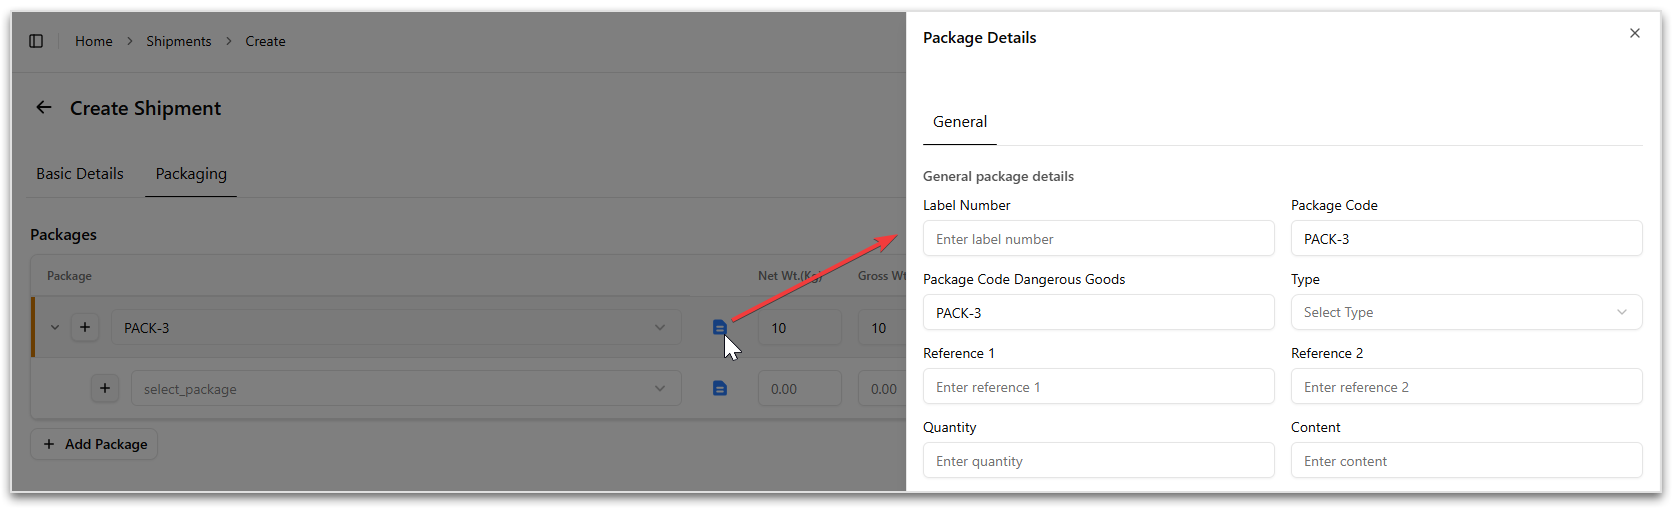
To add details of the package:
- Click the Package Details icon to open Package Details window.
Note
You can add multiple packages to a single shipment!
Use the delete icon to remove a package if required!
Managing Articles
Articles are managed in the Articles section below the packages.
Each package is displayed as a tab, allowing you to quickly view and manage the articles assigned to that package.
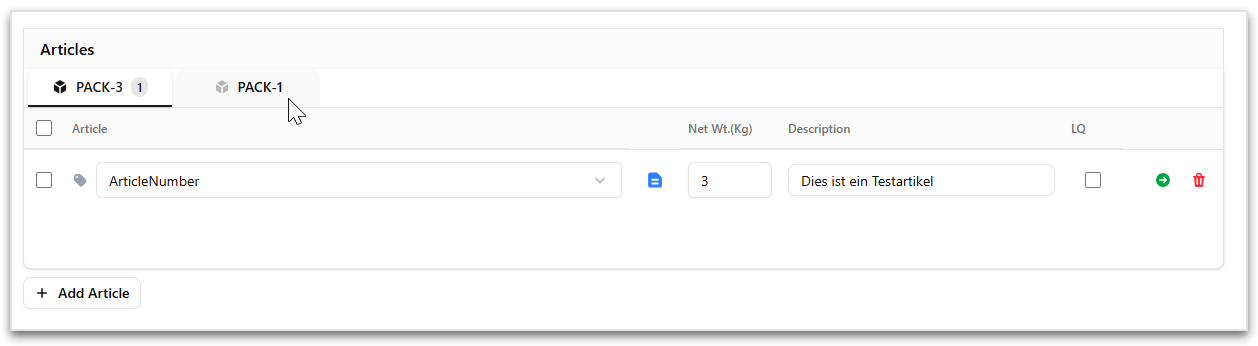
To add an article to a package:
- Select the required package tab.
- Click Add Article.
- Select a article type from the drop-down.
- Fill in the respective input fields, such as
- Net Weight
- Description
- LQ (Limited Quantity) if applicable.
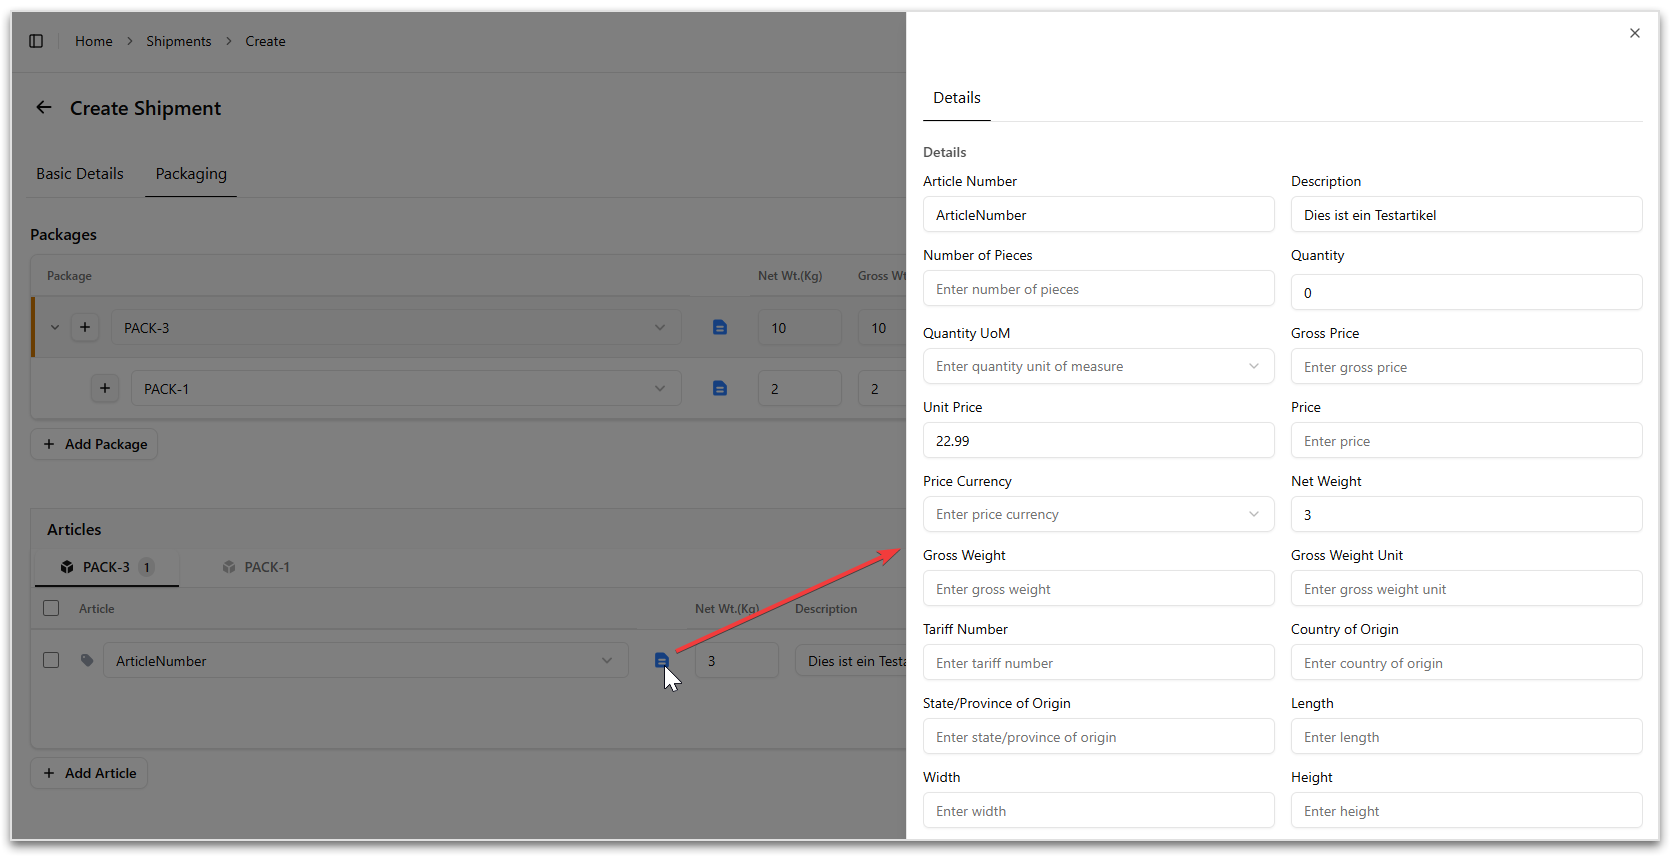
To add details of the article:
- Click the Article Details icon to open Package Details window.
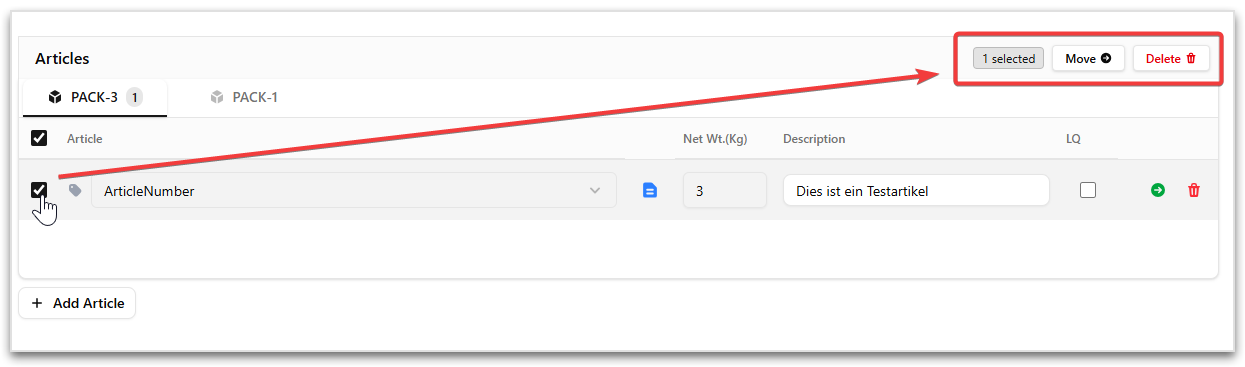
Moving Articles Between Packages
Articles can be reassigned to another package.
To move articles:
- Select one or more articles using the checkbox.
- Click Move.
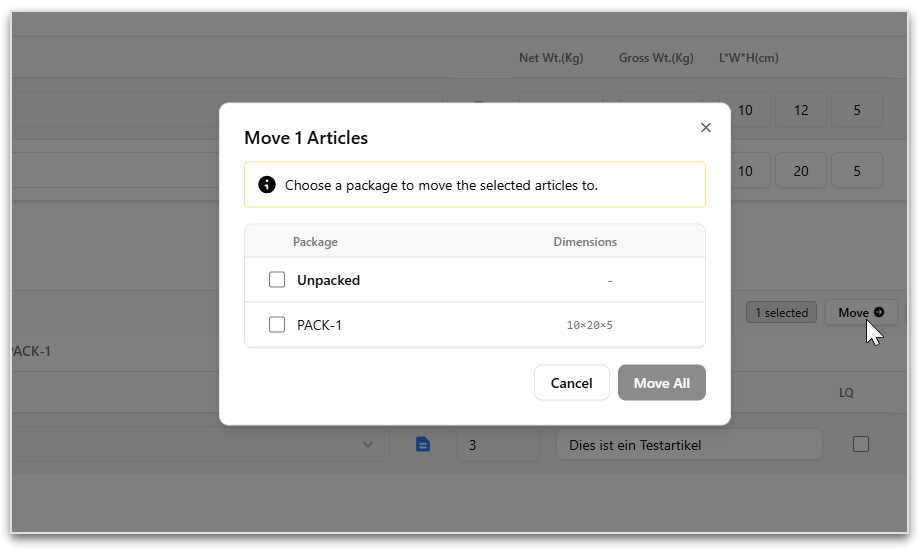
- In the Move Articles window, select the target package.
- Click Move All to complete the action.
Note
- Each package can contain multiple articles!
- Articles can be moved between packages if required!
- Use the delete icon to remove a package or article!
Finalizing the Shipment
- Review all entered details in Basic Details and Packaging.
- Ensure mandatory fields are completed.
- Click Save to persist the shipment.
- Click Print Label to generate and print the shipping label once all mandatory fields are completed.
Once created, the shipment appears in the All Shipments list and can be searched, filtered, exported, or printed.
Best Practices
- Ensure addresses and shipping types are correctly configured in Master Data before creating shipments.
- Always verify carrier and product selection to avoid label generation errors.
- Use meaningful shipment references to simplify tracking and reconciliation.